Window snapping and split screen for Mac
The split screen you love from Windows, back on your Mac
Since macOS 15 you can drag a window to an edge to tile it, but not the way Windows does it. WinPlug Layout brings the rest: Win + arrows, quarters and thirds, the window for the other half, one shortcut to your other display, and every window back in place when you plug it in again.
Free 14-day trial$24 one-timemacOS 14 or later

Split screen on Mac: what you miss coming from Windows
Coming from Windows, this is where your Mac arranges windows differently, and what WinPlug Layout brings back.
| On a Mac | With WinPlug |
|---|---|
| Win + arrows don’t snap windows: the Mac’s own keys are Fn + Control + arrows, on macOS 15 and later. | Win + arrows snap like on Windows: a half, a quarter, the whole screen, and back. |
| Tiling gives halves and quarters, but no thirds. | Ctrl + ⌥ + → gives a third, then two thirds; Ctrl + ⌥ + ↑ centres one. |
| Split View fills the other half, but only in full screen, in a space of its own. | After a half, pick the window for the other half, right on your desktop. |
| The green button sends a window to full screen, in a space of its own. | Win + ↑ or the top edge fills the screen and stops above the taskbar. |
| Moving a window to your other display takes a drag or a trip to the Window menu. | Win + ⇧ + → sends it there, in the same place, at the same size. |
| Unplug a display and its windows pile up on the laptop, and stay there. | Save your layout once: plug the display back in and every window returns. |
| With two displays side by side, a dragged window slips onto the other one: no snapping on that edge. | The pointer pauses at the shared edge so the half snaps. Push on to cross over. |
Split screen on your Mac: drag a window to the edge
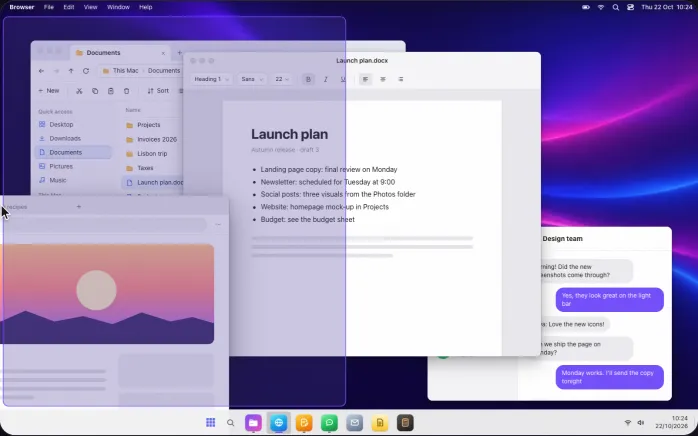
Drag a window by its title bar to the left or right edge of the screen.
A violet outline shows where it will land; let go and it takes that half.
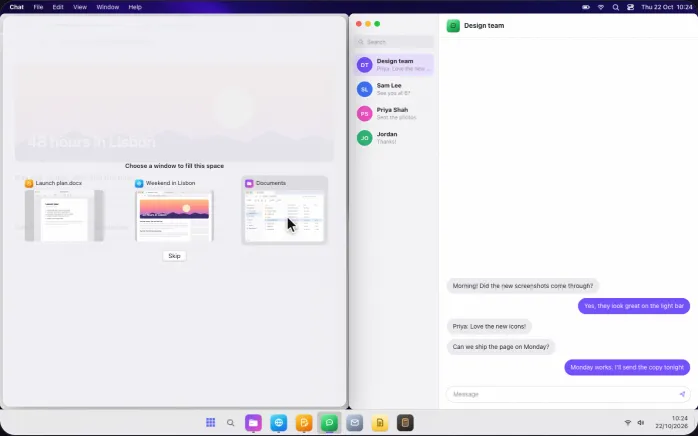
Then the other half offers your open windows, so the split screen is done in two moves.
Skip, or press Esc, to leave it empty.
Snap to a corner, or maximize without going full screen
Drag a window into a corner and it takes a quarter of the screen.
Drag it to the top edge and it fills the screen, without the full-screen mode of the green button: the menu bar and the taskbar stay where they are, and your other windows are still one click away.
Pull a snapped window away and it gets its size back
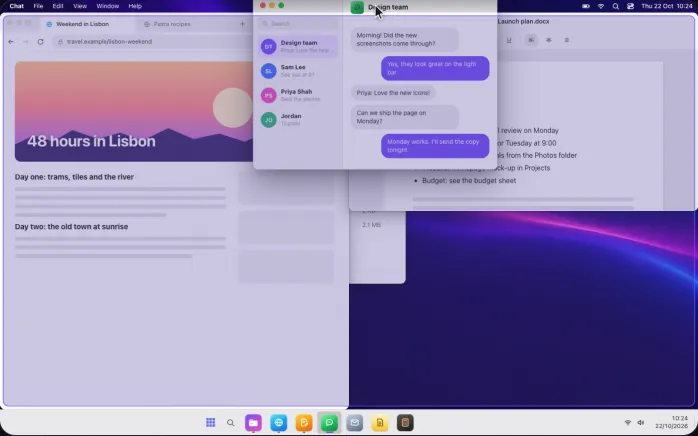
A window you snapped remembers the size it had before.
Grab its title bar and pull it away from its half, quarter or full screen: it shrinks back to that size right under the cursor, ready to drop anywhere.
Keyboard shortcuts to snap windows: Win + arrows
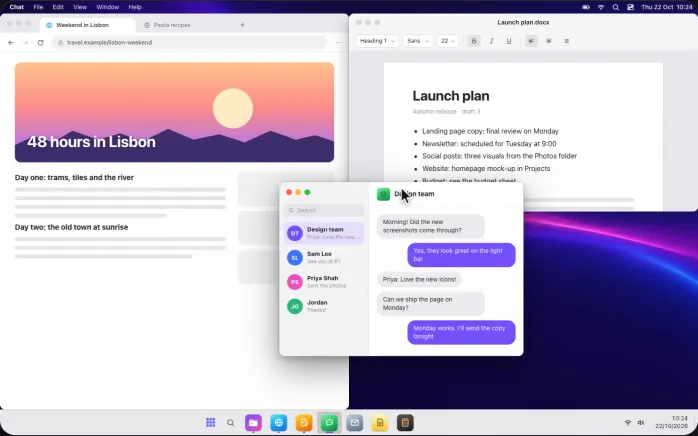
Win + ← or → snaps the window you’re in to a half.
Win + ↑ turns a half into a quarter, or fills the screen; Win + ↓ goes back down a step, then gives the window its own size again.
Press Win + ← once more on a left half and the window moves to the display on the left.
On a Mac keyboard, Win is the Command key.
Put 2 windows side by side on your Mac, in 2 moves
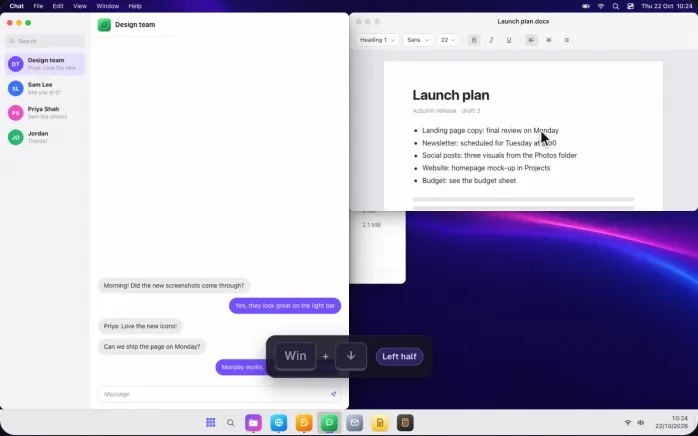
Snap a window to one half and the other half lists the windows you can see, with a live thumbnail of each.
Click the one you want and it fills the space: two windows side by side, on your own desktop, not in a separate full-screen space.
Apps you hid with Command-H stay hidden.
Split your Mac screen into thirds
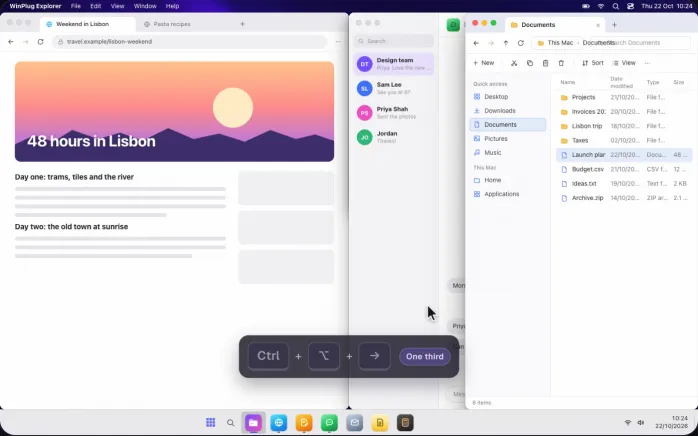
Ctrl + ⌥ + → snaps the window to the right third of the screen; press it again for two thirds, a third time for its own size.
Ctrl + ⌥ + ← does the same on the left, and Ctrl + ⌥ + ↑ puts it in the centre third: three windows side by side, made for wide screens.
Move a window to your other monitor with one shortcut
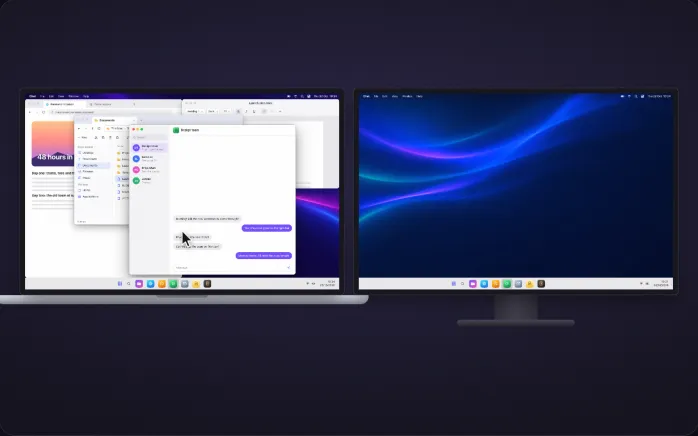
Win + ⇧ + → or ← sends the window you’re in to your other display.
A snapped window keeps its zone, a half stays a half; any other window keeps its place and its size, in proportion to the new screen.
With two displays, either arrow simply means the other one.

Windows back in place when you plug your monitor in
Arrange your windows on your laptop and your monitor, then press Control-Option-Command-S to save the layout.
Unplug the monitor and macOS piles its windows onto the laptop; plug it back in and, two seconds later, WinPlug puts every window back where it was.
Each set of displays keeps its own layout.
Maximized windows stop above the taskbar
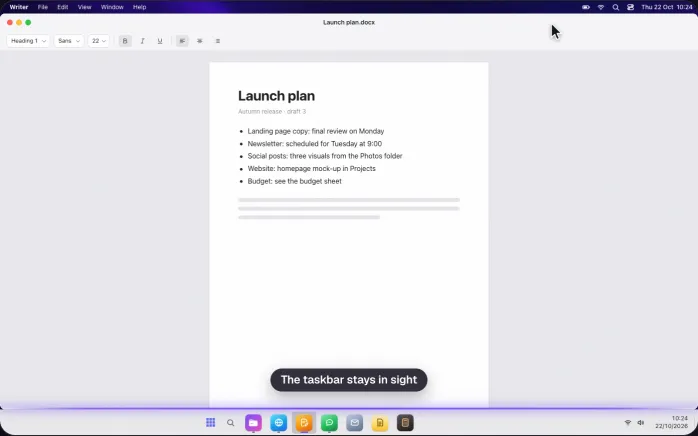
Whether you drag a window to the top, press Win + ↑ or double-click its title bar, it fills the screen and ends right above WinPlug’s taskbar.
Nothing hides behind the windows: the taskbar, its previews and the clock stay in sight.
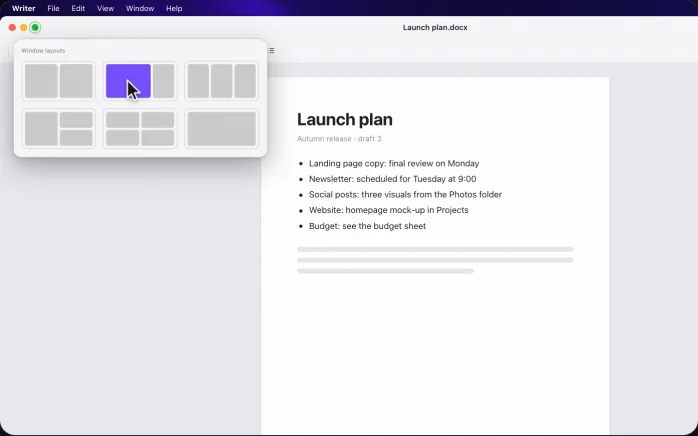
6 window layouts on the green button
Hover a window’s green button and six layouts show up: two halves, two thirds and a third, three thirds, a half and two quarters, four quarters, or the whole screen.
Click a zone and the window goes there, then the space that’s left offers the window to fill it.
And also…
The centre third
Ctrl + ⌥ + ↑ puts the window in the middle third of the screen, for a third window between two others.
Across displays with Win + ←
On a left half, Win + ← carries on to the next display and lands on its right half, as on Windows.
Several layouts
Save more than one layout: Control-Option-Command-L lists them, Control-Option-Command-P moves to the next.
Win + ↓ to minimize
On a window that isn’t snapped, Win + ↓ minimizes it to the taskbar.
Ctrl + arrows, as an option
Turn it on and Ctrl + ← or → snaps a half; press it again and the window goes back. Ctrl + ↑ fills the screen.
Space between windows
Leave a gap of up to 24 pixels between snapped windows, or keep them edge to edge.
Instant desktops
As an option, switch desktops at once, in about a tenth of a second, without the slide.
Your choice, piece by piece
Corners, the top edge, the other half’s suggestions, Win + arrows: switch each one on or off in Settings.
Window snapping shortcuts on your Mac
- Drag
- To an edge for half the screen, a corner for a quarter, the top to fill it
- Win←→
- Left or right half; again to the next display, or back
- Win↑
- A quarter from a half, or fill the screen
- Win↓
- Back down a step, its own size, then minimize
- Ctrl⌥←→
- A third, then two thirds, then its own size
- Ctrl⌥↑
- The centre third
- Win⇧←→
- Send the window to your other display
- ⌘Ctrl⇧→
- Send the window to the next desktop (← for the previous one)
- Ctrl⌥⌘S
- Save the layout of your windows for these displays
- Ctrl⌥⌘R
- Put every window back as saved (L lists the layouts, P the next one)
- Esc
- Leave the other half empty
On a Mac keyboard, Win is the Command key and Alt is Option; on a Windows keyboard plugged into your Mac, they are the keys you know. Every shortcut can be switched off in Settings.
See it on a real Mac
No mock-up: WinPlug Layout filmed on a real MacBook. Click a feature in the list to jump straight to it.
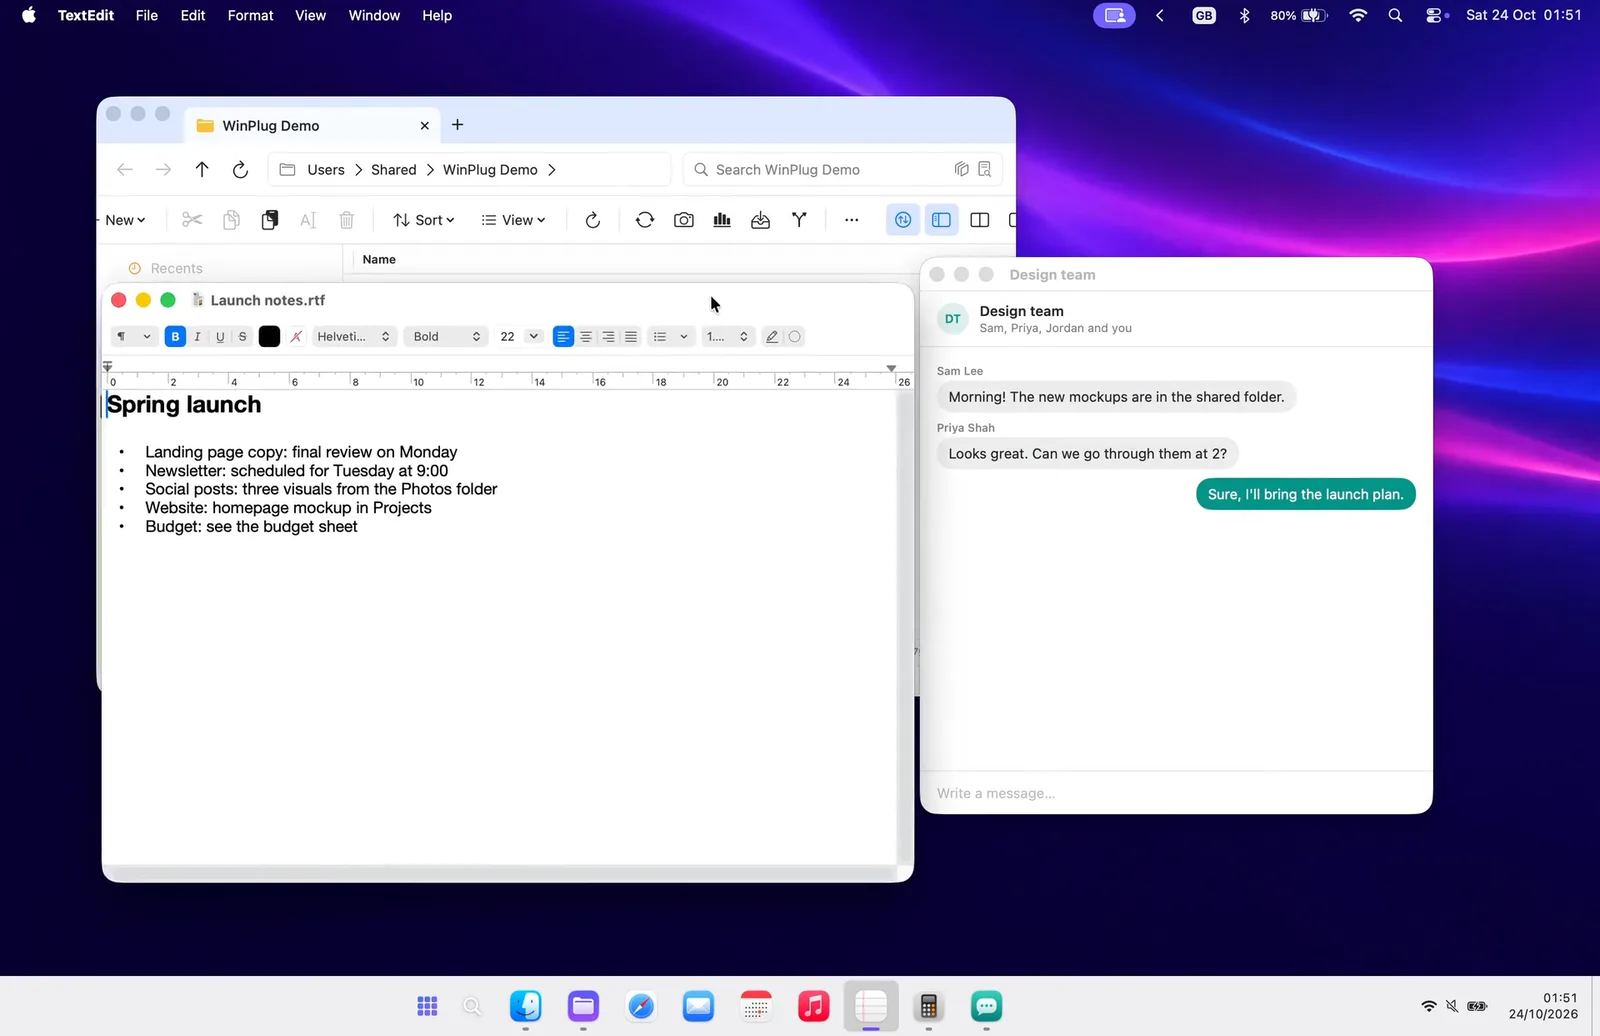
- Drag to an edge: Drag a window to the left or right edge: it takes half the screen.
- Corners and top: A corner gives a quarter of the screen. The top edge fills it.
- Win + arrows: Win + ← or → takes half the screen, ↑ a quarter, ↓ brings it back.
- Thirds: Ctrl + ⌥ + → gives the window a third of the screen, then 2 thirds.
- Second display: Win + ⇧ + → sends the window to your other display, in the same place.
Features in the video
Window snapping on Mac questions
How do I split screen on a Mac?
With macOS alone, hold the pointer over a window’s green button and choose to tile it to the left or right, or Full Screen › Left of Screen for Split View, which fills the other half but in full screen. With WinPlug, drag the window to an edge or press Win + ←, then pick the window for the other half: both stay on your desktop.
Does a Mac have window snapping?
Since macOS 15 Sequoia, yes, in part: drag a window to an edge to tile it, or use the green button’s menu, for halves and quarters. WinPlug adds what Windows has on top: Win + arrows, thirds, the window for the other half, one shortcut to your other display, maximized windows that stop above the taskbar, and layouts remembered for each set of displays.
What is the keyboard shortcut to snap windows on a Mac?
macOS 15 and later tile a window with Fn + Control + arrow keys. With WinPlug, it’s Win + arrow keys, as on Windows: Win is the Command key on a Mac keyboard. Win + ← and → give halves, Win + ↑ a quarter or the whole screen, Win + ↓ brings the window back.
How do I maximize a window on a Mac without full screen?
The green button makes a window full screen, in a space of its own. To fill the screen and stay on your desktop, double-click the title bar or hold Option and click the green button. With WinPlug, Win + ↑ or dragging the window to the top does it, and the window stops above the taskbar.
How do I move a window to my other monitor on a Mac?
With macOS alone, drag it across, or choose Window › Move to and the display’s name. With WinPlug, press Win + ⇧ + → or ←: the window goes to the other display in the same place, and a snapped window keeps its half or quarter.
Can I split my Mac screen into three?
macOS tiles into halves and quarters only. With WinPlug, Ctrl + ⌥ + ← and → snap a window to a third of the screen and then two thirds, and Ctrl + ⌥ + ↑ puts one in the centre: three windows side by side.
Why do my windows move when I unplug my monitor?
When a display goes, macOS moves its windows to the screens that are left, and doesn’t put them back when you plug it in again. With WinPlug, save your layout with Control-Option-Command-S: plug the display back in and, two seconds later, every window returns to its place.
Do I need to turn off the Mac’s own tiling?
No. WinPlug works next to it, and you can keep both. If you’d rather have only one outline when you drag a window to an edge, turn off “Drag windows to screen edges to tile” in System Settings › Desktop & Dock.
One license, every habit
WinPlug Layout comes with 8 more modules: one license, $24 one-time at launch, for 2 Macs, with a free 14-day trial and no account.
- WinPlug TaskbarA real taskbar: every window one click away, previews on hover, a Start menu.
- WinPlug SnapCapture an area, a window or the whole screen, and mark it up.
- WinPlug KeyboardYour Windows shortcuts as they were: Ctrl+C, Ctrl+V, Alt+F4, Home and End.
- WinPlug SwitchAlt-Tab window by window, with live thumbnails, search and Peek.
- WinPlug ExplorerA file explorer that cuts and pastes, with an address bar and dual pane.
- WinPlug CaptureRecord the screen, a window or an area, then cut, style and export it in an editor.
- WinPlug ClipboardEverything you copy, kept in a history you can paste from.
- WinPlug MouseThe wheel scrolls like Windows, the trackpad stays natural, Ctrl + wheel zooms.